
How to make your own kit — Weapons!
Spears were carried by all Celts. and it is strongly recommended that all members have at least one. A spear is the cheapest and easiest weapon to acquire, so it is a good one to start with. Real battle spears must be extremely blunt and used with great care. Blows must never be aimed at the head, but at the shield or body well below the chest with light force. Jabbing at the body is discouraged, instead try sideways blows. Sharpened spears may be kept for static display purposes during living history displays, but must never be used in practice or stage fighting. For combat/fighting, needlefelt spears will be used. Only needlefelt spears may be thrown in combat — real spears mainly only be thrown against inanimate targets for display purposes in a secure area, or at a willing idiot as a demonstration of the spearfeat.
MISSILE WEAPONS
Javelins
Javelins are similar to spears, only shorter (about 1 to 1.5m long). The points are smaller, and there is not usually a butt-spike. They are normally sharp, since they are never used in combat and only for target practice and display. A real Celt would carry about three into battle, in his shield hand, and throw them at the enemy just before going in hand-to-hand.images/
Slings
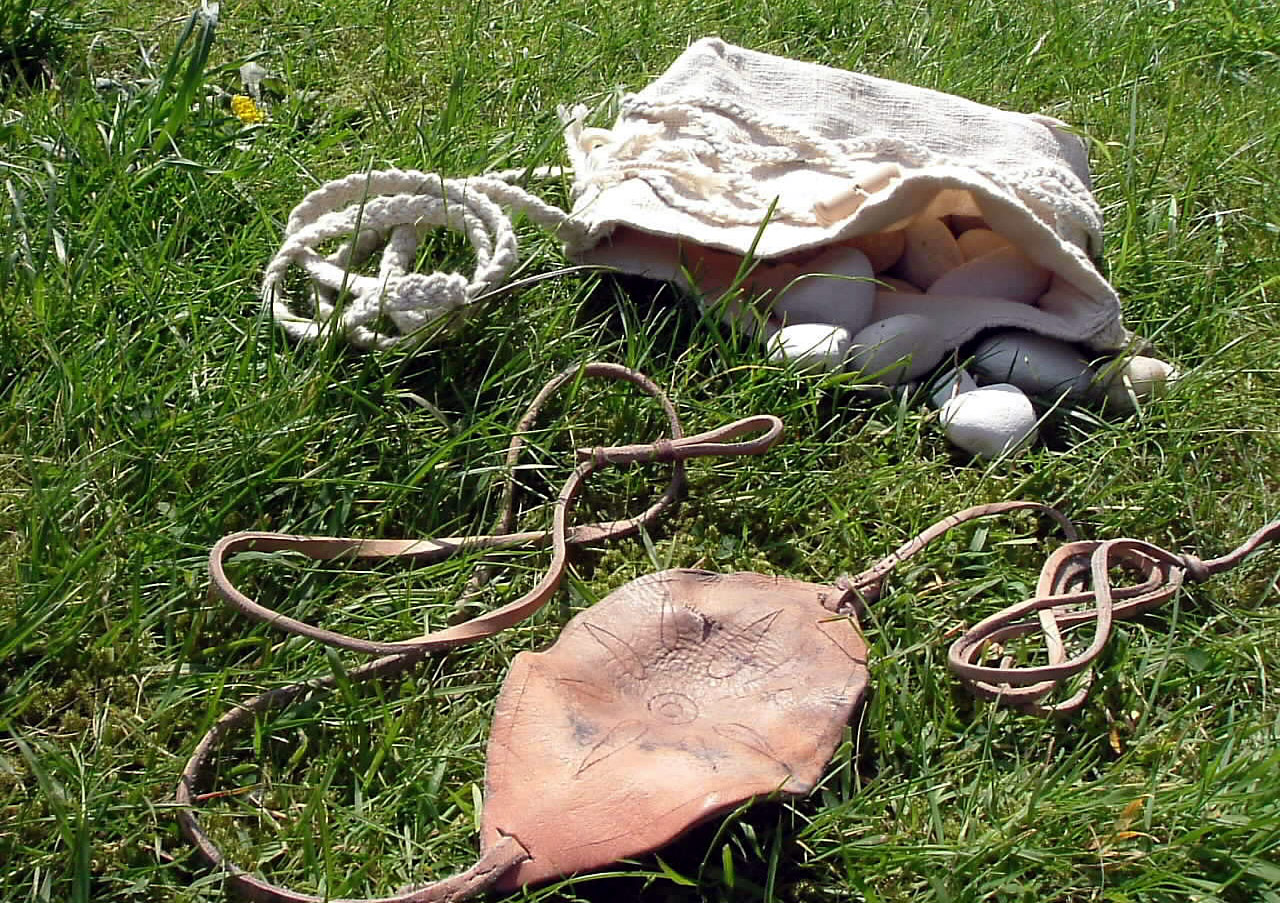 Slings were a common weapon, made in leather. They may not be used during stage fighting, but with suitable warning may be fired in volleys before battle for demonstration purposes, if aimed well away from the opponents or public. They may also be demonstrated in living history displays, or just worn for show. I spent months learning to use mine, its a lost art.
A great website that will teach you how to make and use a sling is HOW A SLING IS MADE. Why not go there and check out this humble, but deadly weapon of the ancients.
Bows
Bows were used for hunting by the Celts, but curiously were seldom used in battle. if you want to carry one for show or demonstration, you will have to show provenance. A modern short bow isn't good enough. Long bows are completely wrong.
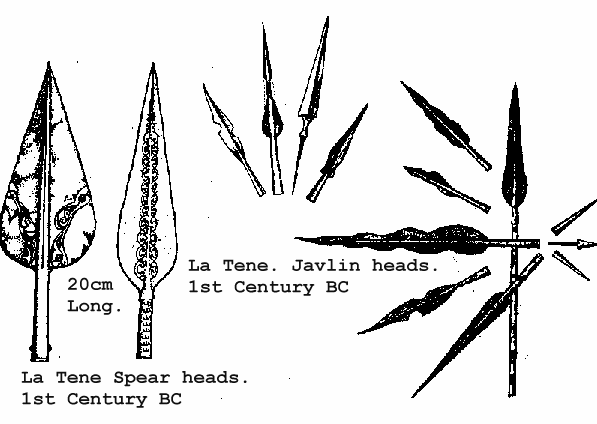
There are several suitable designs, all graceful, some decorated. Many weapon-smiths make suitable spear heads for anything between £15 and £40, and butt-spikes for about a tenner. Then all you have to do is add a wooden shaft between the two. Do this by planing, filing or power-filing the wood to fit the spear head or butt-spike snugly, then glue it in with lots of PVA adhesive. Drill small holes through the metal and knock in nails or rivets for extra strength. Round off the heads with a ball-peen hammer to remove sharp points for safety . The whoIe spear shouId be about 2 to 2½m Iong , or whatever will fit in your car.
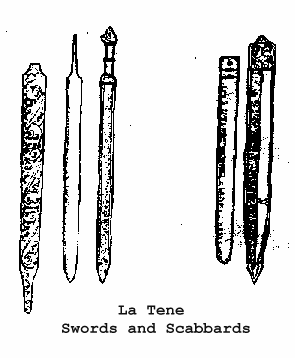
Swords
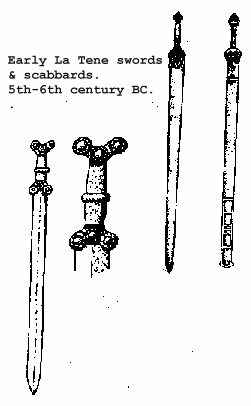 After a season you may want to move up to the classic weapon of the nobility, the sword. Swords were carried by nobles and chieftains. These were one-handed broadswords of a distinct design. No Dark Age or Viking sword will do. Handles were small with almost no guard at all: the sword was seldom used for parrying, that was what the shield was for. Blades must be made of hardened steel, such as spring steel, EN45 or EN47. MiId steeI becomes serrated too quickIy. making sharp edges that can be dangerous in combat.
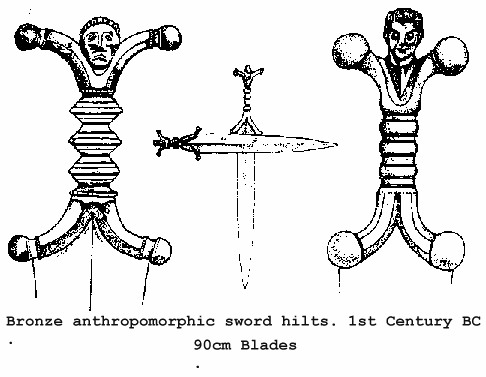
The blades must have parallel edges, not tapered, of oval or diamond cross-section: no furrow. The end must be rounded for combat. Any blade size is acceptable. between 4cm wide by 60cm long up to 5cm wide by 90cm long , not including the tang for the handle. Battle swords must be blunt and their edges de-burred. Sharpened swords may only be used for living history static display purposes. Typically suitable handle designs are the anthropomorphic, Embleton, Thorpe. Hod Hill, Marne Valley and Kirkburn. You can buy complete swords for between £80 and £200, depending on quality
Very few smiths know Iron-Age designs, so make absolutely sure the one you are dealing with can supply an appropriate blade and hilt, such as Ivor Lawton or Ulfric.
Alternatively you can buy just a sword blade for about f40, and add your own handle. This is tricky. Pine wood is useless, you need something really hard such as 30 year old seasoned oak, fruit wood or mahogany. Or you can use antler or bone, or go the whole hog and have one cast onto the hilt in bronze. Some Celtic swords actually had iron handles built directly onto the blade.
Scabbards
Scabbards are the thing to carry a sword in, unless you want to carry it in your hand all day (never stick it in the ground: it makes the blade rust and increases the chances of giving someone tetanus). These were made in several ways, out of leather, wood, bronze sheet and iron. You can make them yourself, or pay a smith. My iron scabbard cost £80, but you can get cheaper. Leather is the easiest, cut and stitched to carry the sword snugly. Vegetable tanned cowhide is best. Glue, stitch and rivet a bronze plate around the top. This is for show, and to attach the belt fastening. You can also add a chape at the bottom, either made yourself, or Hightower crafts do a usable one.
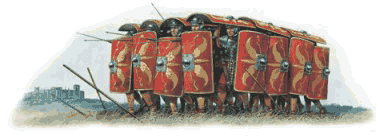
 If you feel really flash you can decorate the scabbard in repousse. Research this yourself, I've never done it. At the top at the back of the bronze wrap-around plate rivet on a fastening loop. Wood is easy as well. The scabbard is basically a wooden box open at the smallest face into which the sword slides. We have learned that lining the scabbard in sheepskin with the fur inwards makes it grip the sword securely, and the lanolin in the wool oils the blade. Paint, carve or add bronze repousse plates for decoration. The scabbard is hung off the widest part of the hip using a cunning arrangement consisting of three leather straps (about 8", 18" and 48" long respectively) , three metal rings about 1 to 1.5in diameter , a hook buckle and a leather thong. Scabbards had a unique decorative art form associated with them, so choose any decoration carefully. Fighting sword-on-sword is fun and reminds us all of "Highlander", but is probably not very authentic and claims a heavy toll in wear and tear on the sword. It is best to fight with a shield. It is even better to fight with your own shield, since they wear out eventually as they are steadily hacked to pieces, and it is not fair to expect someone else to go to all the effort of building a shield, just so you can borrow it and get it wrecked.
Shields
Shields are a lot of work to build. To be fully authentic we should fight on the field with long infantry shields, but this is exhausting unless you are Arnold Schwarzenegger, so many choose to make smaller, lighter, easier-to-make round shields (such as normally used by cavalry). Cut a circle in 9mm (or l3mm if you think you're strong) ply, about 60 an in diameter. This is reasonably close to the laminated strips of oak the Celts used to glue together to make a kind of ply wood.
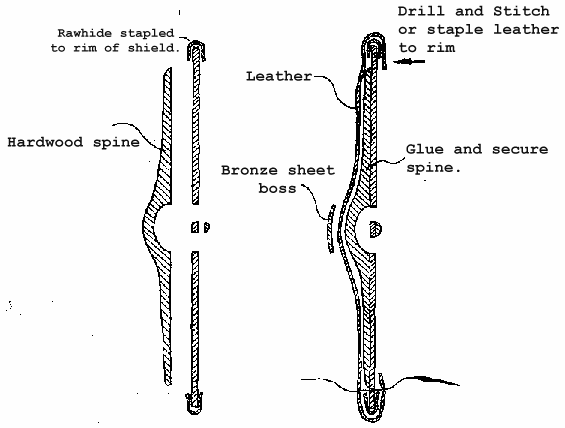
Cut out two 'D' shapes at the center to leave a handle. Make sure this is big enough to get your gloved hand in, but not too big to be covered by the boss. Take a raw-hide dog-chew "bone" and soak it in water for a few hours until it becomes soft. Undo all the knots, and lay out in lengths. Cut each length in half length-ways. From now on the magic ingredient is PVA adhesive (excellent for shields, useless for sniffing), and lots of it. With a brush spread liberally around the rim of the shield and on the dog-chew, then with a staple gun (or using small tacks) fix the dog-chew round the entire rim of the shield. Leave overnight to dry; the dog-chew will dry hard and perfectly take up the shape of the shield, held securely in place by the staples and the PVA.
Next, find some old cloth (anything, old curtains, tea towels, whatever). Put plenty of PVA on the front of the shield in sections, and lay on the cloth, brushing more PVA on top. Allow the cloth to overlap the edge of the shield by 2", covering the dog-chew and staples, and glue to the back. Add more layers of cloth, always using plenty of PVA, not necessarily waiting for the previous layer to dry. A total of 3 layers will do, 4 or 5 is best. Leave to dry
Paint the front of the shield with 2 or 3 coats of white emulsion, not gloss. We are fairly sure that the Celts never invented gloss paint in the Iron-Age. Now paint it whatever colour you like, and add on whatever Iron-Age Celtic patterns you fancy, again using matt paints.
Cut away the cloth over the 'D' shapes. With wood glue and screws, fix a rounded piece of wood to the handle, if necessary extending it past the grip so that the coach bolts secure it as well as the boss. Finally sand it smooth for a comfortable grip. Fix the boss to the shield, using coach bolts with the lettering filed off so that they look like rivets from the front. Cut all the bolts to length with a hacksaw so that they stick out at the back as little as possible, and try to countersink the nuts at the back into the wood slightly to hide them.
Finish off with a single layer of cloth glued on the back to cover the nuts, and paint.
If you get serious and decide to try for a long shield, then this is a lot more work. Again using 9mm ply cut a lm long oval, lozenge or "horned" shape (the last is a peculiarly British design). Make a long, graceful boss out of wood, preferably a hardwood such as oak, mahogany or fruitwood. Make a hollow in the back large enough to take your gloved hand comfortably. Screw and glue this to the front of the shield, and fashion the handle as before.
Edge the shield in dog-chew as before, and again cover it in layers of cloth. Alternatively you can use leather, which is more expensive, heavier, much harder to make but much more long lasting.
If you decide to splash-out and use leather, use vegetable tanned cowhide. Cut it to shape, allowing 2" extra at the edge to be beaten round, plus a difficult-to-judge bulge at each side to allow for the leather that will cover up the bulge of the spine at its deepest point at the middle. Soak the leather for 12 hours at least, then let it dry for 6 hours or overnight. With a drill and a small drill-bit, carpet thread or gut or similar and a leather needle, and a ball-peen hammer, stitch, pull, stretch, beat, pummel and intimidate the leather into snugly covering the front of the shield, including the boss, and overlapping the edges by at least an inch. This is incredibly difficult, but it is possible and I know it is possible because I have done it. Let the leather dry completely, and it will be formed hard around the shield, and close to indestructible. Paint the shield however you want.
As a final touch add a metal boss across the front of the long shield over the spine, made from bronze, brass or steel plate, and rivet it on with copper rivets and a ball-peen hammer.
Daggers are made like swords, only much smaller. These are sometimes large and blunt, and used for fighting, or small and sharp, and used for display or as a tool, eating utensil or whatever.
Some more thoughts on Celts
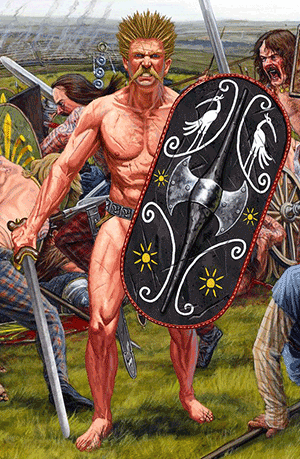
Real Celts spurned armor, and frequently fought naked except for their torcs, woad and lime wash. Rich Celts wore it to show their wealth and status. If you've been doing re-enactment for a few years and think you've got some status, you might decide to make the hardest piece of kit of all. Chain mail can be knitted easily with about 20,000 zinc galvanized split steel washers (worth about £100) , two pairs of pliers and 400 hours of your time. Or you can buy a mass produced set from Legio IX's quartermaster. The Celts invented chain mail in the West, and there are a couple of distinctive Iron-Age Celtic patterns known.
Helmets
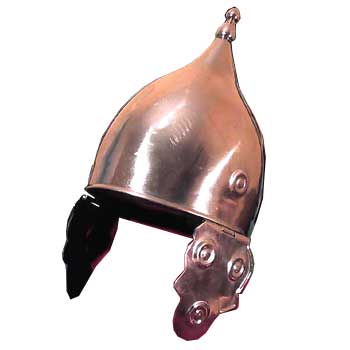 This is the kind of look you should be looking for.Helmets look deceptively like Roman issue, but they are not. The resemblance is there because the Romans copied the Celtic design. The Agen/Port type were of a bowler hat type construction in iron, with neck and cheek guards. These are possible to make at home with a lot of effort and ingenuity, or you can commission one off a smith for about £120. Ivor Lawton has a suitable one in his catalog, but choose the design carefully.
 Page Author: Roma Admin Last edited: April 12, 2023